Posts

Showing posts from 2013

security fail: home DVR/camera systems

Image
Many people, such as myself, decide to invest in home security camera systems.  Most of them nowadays allow you connect directly to the system via your smartphone.   As I am in the computer security field, I tend to wonder just how secure things are in my own home.  So I put my NiteOwl 16 channel DVR system to the Pepsi challenge.  It failed horribly. Whenever I send my username and password across the internet to look at my home security cameras, the credentials are sent in clear text.  Anyone in computer security knows is a not a good thing.  Clear-text credentials are very easy to intercept.  And most people don't know how to properly defend themselves and their home against cyber threats.  So lots of people will use one password for everything.  So if someone was to intercept this DVR password, the attacker has a lot of helpful information. The intercepted information will include: the username, which is likely the username also used in at least one of the computers on t
SSH PKA the easy way

this tutorial involves 2 computers, a client and a server.  As you should know, a client will connect to the server.  You can always add an ssh server to your client machine, but we aren't going to worry about that today. on the client machine: # cd /home/username The username needs to be the username you are going to use to connect, and that username must exist on the server machine as well.  You can do it other ways, but that is a complication we won't get into today. # mkdir .ssh # chmod 700 .ssh/ # cd .ssh # ssh-keygen -t rsa -b 2048 (some ssh servers like hardware appliances require dsa, so use ssh-keygen -t dsa in those cases) Accept the default values and it should put the keys in the folder you just created. # chmod 640 id_rsa.pub # chmod 600 id_rsa # nano /etc/ssh/ssh_config Add the following line (or uncomment the line if it already exists) IdentityFile ~/.ssh/id_rsa Then use CTRL-O to save and CTRL-X to exit One the server machine: Install the SSH se

Using Radius authentication with Apache web server

The following will install radius authentication on your RHEL/CentOS apache web server.   You can use these instructions for different linux builds, you will just need to adjust by finding the correct folder locations and package names.  Also this is a 64-bit system, so for 32-bit change the package names from x86_64 to i386 or whatever YUM tells you is available. This configuration assumes you already have a functioning web server.  If you don't please find a separate tutorial on apache web server for your OS.  You must have the radius server configured before attempting this configuration.   You need to add each user to that linux box beforehand (useradd).  This will replace htpasswd authentication, but will only work for users defined in the radius server and the local linux server. To my knowledge, you cannot have both radius and htpasswd authentication running at the same time.  Also, applications that have their own authentication system outside of htpasswd (such as mysq

Using Radius authentication with SSH

The following will configure your linux-based SSH server to use a pre-defined radius server for authentication instead of plain password authentication.  You must configure the radius server before starting this configuration.  This is for Linux 64-bit bit but for 32-bit just change package names from .x86_64 to i686.: ·          Download install package (make sure the server can access the internet via port 80/443) # yum install freeradius  pam_radius.x86_64  pam_radius.x86_64  pam.x86_64  type y when it asks you if this is OK, hit ENTER ·          Edit the conf file # nano /etc/pam_radius.conf ·          Add the correct radius server info as follows 192.168.1.5        secret      5 192.168.1.6         secret      5 ·          Use CTRL-O to save the file and CTRL-X to exit. ·          Set file permissions # chmod 600 /etc/pam_radius.conf ·          edit the sshd_config file # nano /etc/ssh/sshd_c

Restarting Nagios prompts for password

Image
There is no discussion for this topic as far as I can see so here is my resolution in case it helps anyone The setup process I have lined up ends up forcing Nagios to ask for a password every time the service is restarted.  The service still starts up fine even if the password is incorrect.  So it really doesnt matter except for one major problem.  If the computer reboots unexpectedly, the service hangs waiting for someone to hit ENTER.  So to fix this, I modified the service script # vi /etc/rc.d/init.d/nagios o Search for Starting nagios o You will see this line su - $NagiosUser -c "touch $NagiosVarDir/nagios.log $NagiosRetentionFile" o Change the line to this text (or you can comment out the original line and add a new line as pictured below) touch $NagiosVarDir/nagios.log $NagiosRetentionFile o Save and exit the file. o Restart nagios # service nagios restart o Done.

Scion xB 2005 - Fuel Filter replacement DIY

Image
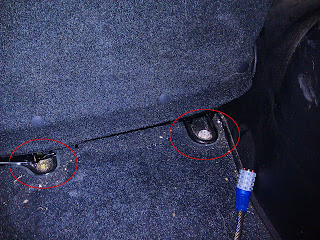
Warning: this is for educational purposes only.  Neither I nor anyone else on the planet is responsible for your stupid decisions and lack of thinking.  The information provided here is the best of my documenting ability and nothing more.  Like ANYTHING on the internet, it should not be considered as the full truth with no missing pieces.  If I leave anything out, it's your responsibility to find the rest of the puzzle.   ie, if you blow your car or yourself into a million pieces, it's YOUR fault. Note:  This took a lot more effort than I had anticipated even with the other DIY articles I found on this subject.  I personally will be paying someone to do it for me next time.  If you decide to take this on, I suggest you go ahead an replace the fuel pump while you are at it, as long as you have at least 60,000 miles on the toaster.  My pump died at 94k miles. Before you begin, make sure you have access to tools as you will need a wide range of them.  You will find out what s